Simple Object Design in Business Central

Simple Object Design in Dynamics 365 Business Central is an easy way for users to customize their Business Central environments without having to be an expert programmer. Often, the end user wishes for the ability to do what programmers do – magically add fields and conduct other customizations within Microsoft Dynamics 365 Business Central. Sure, Personalization and even Design may be conducted to move and remove fields from screens. But such activity represents minor “customizations” at best.
Simple Object Designer (SOD), developed by Erik Hougaard, provides an intuitive user interface for completely customizing Business Central. SOD will let you add fields to screens, reports, and other objects. You can even add calculated fields. In addition, you can create new Roles within Business Central from scratch! Instead of using Application Language programming, rely on SOD.
Creating New Fields
Use the search function within Business Central to locate Simple Object Designer:
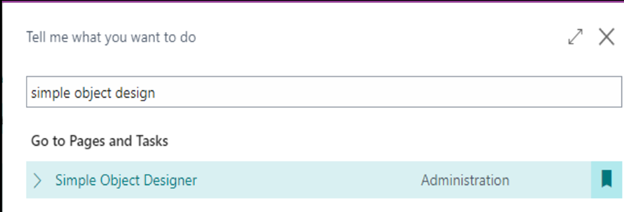
Tip: Instead of clicking the link for Simple Object Designer shown above, select the “Bookmark” icon to the right. Doing so will place a link for SOD on Business Central’s Role Center. Instead of searching for SOD each time that you need to create or modify a customization, simply click the link for one-touch access to SOD!
Recently, we at Bond Consulting Services conducted a customization for Business Central’s Chart of Accounts. An end user asked to have two fields added on both the “G/L Account Card” Page and the “Chart of Accounts” List.
Specifically, the user asked for Account_Group and Description as two new fields.
Account_Group is a four-digit number denoting sections of the chart of accounts, as follows:
- 1000 = assets,
- 2000 = liabilities,
- 3000 = equity,
- 4000 = sales revenue and cost of goods sold,
- 5000 = administrative expenses,
- 6000 = selling expenses,
- 8000 = miscellaneous income and losses on sale of fixed assets, and
- 9000 = temporary accounts.
Description is a text field complementing the “Name” field in the Chart of Accounts.
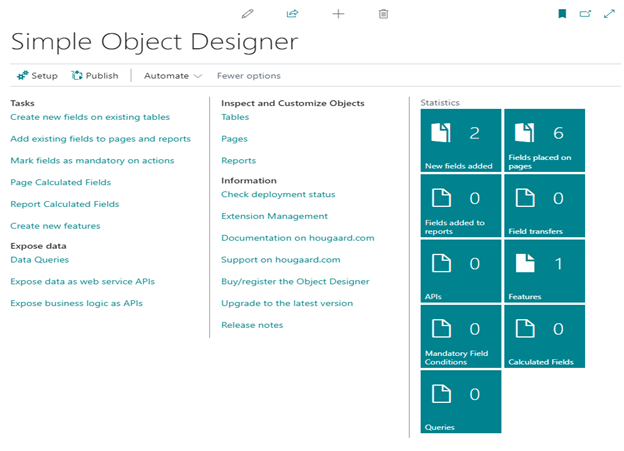
To create such additional fields for the user, we clicked Create new fields on existing tables in the upper left of SOD.

Obviously, clicking New in the “Create Fields” screen allowed for the creation of each field. Since the fields are similar, we’ll just discuss the “Description” field:

Using the “Table Name” field allowed us to search for the necessary table – G/L Account.
FieldNo is an automatically generated number.
In Field Name and Caption, we simply typed “Description”.
The Type chosen was “Text”, and we specified “50” for Size.

Returning to Create Fields, three columns on the right bear mention:
- Placed on pages – provides access to any page containing general ledger accounts.
- Field Transfers – allows data to travel from G/L Account to any other table.
- Placed on reports – provides access to any report containing general ledger accounts.
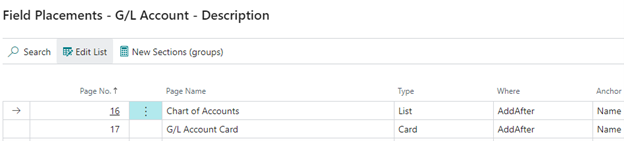
In using the “Placed on pages” column, the “Field Placements” screen appears. The “Where” and “Anchor” columns on the right show that we decided to place the new “Description” field after the “Name” field in both the “Chart of Accounts” List and “G/L Account Card” Card.
Going back to the main screen for SOD and clicking “Publish” and then “Yes” allowed us to see the new fields.
This is the “Chart of Accounts” List showing the new “Account_Group” and “Description” fields: 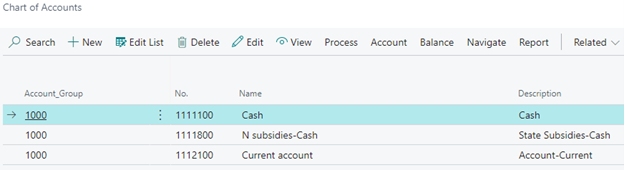
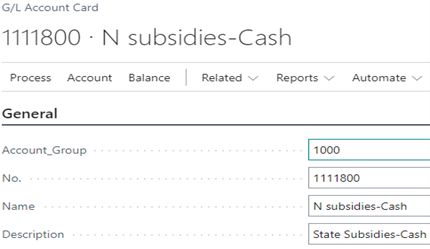
The corresponding Card for account number 1111800 shows the two new fields, as well:
Creating a Calculated Field
Let’s, now, create a calculated field in Business Central by clicking Page Calculated Fields in SOD.
 Once you have clicked New and filled in the applicable fields, click the “Edit Expression” button at the top.
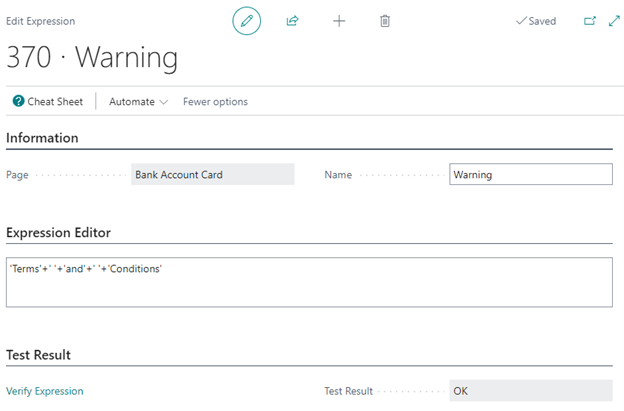
Within Edit Expression we have created a concatenated text formula to display the phrase, “Terms and Conditions”.
Click Verify Expression and ensure that the “Test Result” field displays “OK”.
Now, let’s return to the “Calculated Fields” screen.

The “Page”, “Where”, and “Anchor” columns show that SOD will place this field after the “Name” field of Bank Account Card.
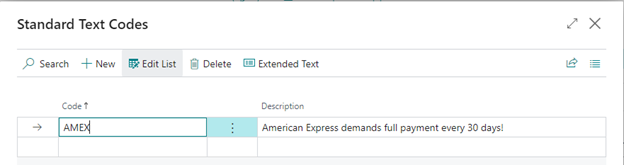
Also, the “Drilldown Page No.” column shows that SOD has created this calculated field as a drilldown field. Specifically, clicking within this field will drill down to Page 8 – the “Standard Text Codes” screen.
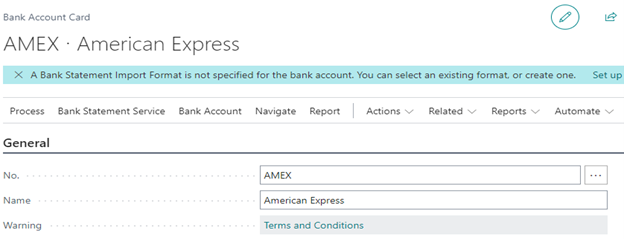
One we have published this, we see this new calculated field in Bank Account Card where we can drill down:
Although we didn’t need to click on it within this example, you may have noticed that Edit Expression contains a button at the top labeled “Cheat Sheet”.

As expected, the “Cheat Sheet” screen provides variables that you can use in formulas. The variable highlighted shows that the screen’s “Name” field will be used, if selected.
When creating a calculated field for a screen containing transactions, you can create mathematical expressions.
Creating a Role Center
Selecting Create new features and clicking the “New Feature” button in SOD allows us to create new Business Central Roles.

Appearing in the top right of the “CUSTOMERITEMS” feature, Business Manager SOD Example is the name of the new Role:
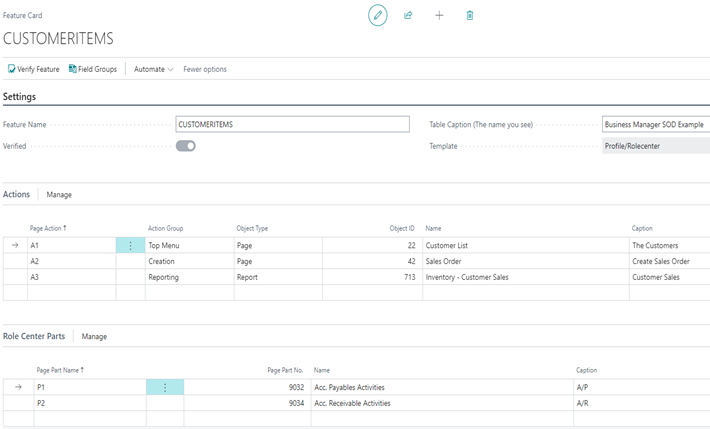
The “Actions” section contains five “Action Group” selections:
- Top Menu – places the object at the top of the Role Center;
- Creation – initiates a transaction;
- Navigation – not used to create a role;
- Processing – conducts a task for an object; and
- Reporting – prompts the user to generate a report.
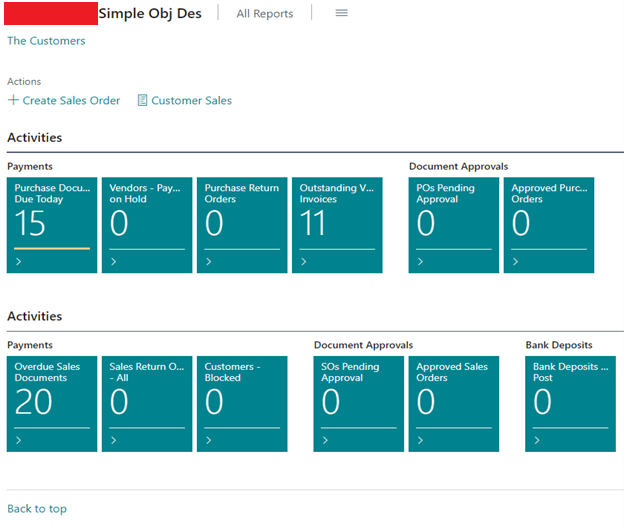
Caption in the far right of the “Actions” and “Role Center Parts” sections contains the names of the items that will appear within this Role Center:
- The Customers,
- Create Sales Order,
- Customer Sales,
- Payables Activities, and
- Receivable Activities.
Next, we click Publish.
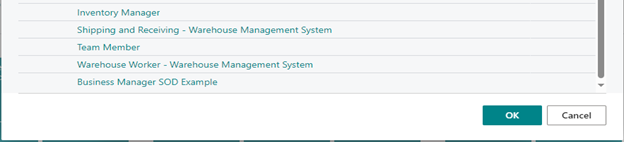
The bottom of Business Central’s Available Roles contains our new Role, for selection!
NOTE: SOD should be installed and used only within a Sandbox environment. In a Sandbox, development can be conducted without risk to Production. Once testing is complete, SOD can generate an extension (i.e., .app file) for uploading into Production.
For more information about SOD or how to maximize your Dynamics 365 Business Central environment, please reach out to us at Sales@BondConsultingServices.com or click here to schedule a free consultation with one of our Dynamics experts. Alternatively, you can always visit our YouTube Channel for helpful product videos and recorded webinars.