Using ACH payments in Dynamics 365 Business Central accelerates payment handling, reduces reliance on paper checks, and strengthens security against unauthorized transactions.
Business Central includes built-in electronic payment capabilities that allow organizations to generate ACH and EFT payment files directly from payment journals. Once configured, finance teams can streamline vendor payments while maintaining accurate records and remittance details.
For many accounts payable teams, ACH payments offer a faster and more secure alternative to paper checks while reducing manual processing effort.
This guide details the steps required to set up ACH payments in Business Central and generate ACH files for efficient payment management.
Before You Begin
Before setting up ACH payments in Business Central, make sure you have:
- Company bank account information
- Vendor banking information
- Payment export format requirements from your bank
- Permission to create and export payment files
This provides context and captures more search intent.
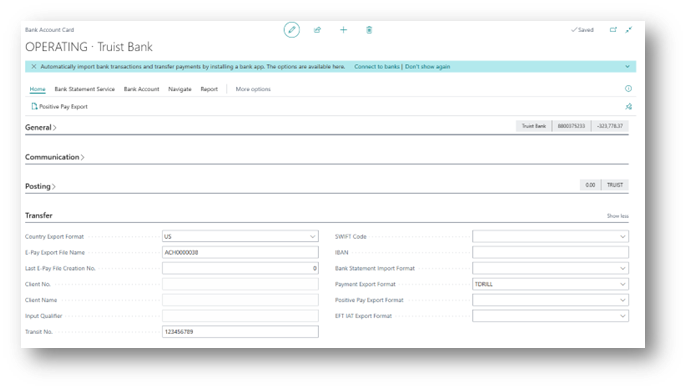
Bank Account Card Setup
The lion’s share of setup for ACH transactions in Business Central is in the Bank Account Card. There, you’ll find several core fields which must be populated to process an ACH transaction.
Follow the steps below to update the five required bank card sections:
- Section: General > Field: Bank Account No.
- Ensure your bank account number is listed properly with no blank spaces.
- Section: Transfer > Field: Country Export Format
- There are only 4 options to select from (US, Mexico, Canada, or Other). The selection should reflect the country your bank operates in.
- Section: Transfer > Field: E-Pay Export File Name
- The file name format listed will be used for remittance files generated during the ACH payment process. Example file name: ACH00000001.
- Section: Transfer > Field: Transit No.
- Ensure your bank account transit number is listed properly with no blank spaces.
- Section: Transfer > Field: Payment Export Format
- Select an EFT Data Exchange from the list of pre-configured files. Alternatively, you can also create a new export format by selecting +New.
- *Tip – If you’re creating a new Payment Export Format, ensure the correct data exchange definition is populated in the Data Exchange Definition Code field.
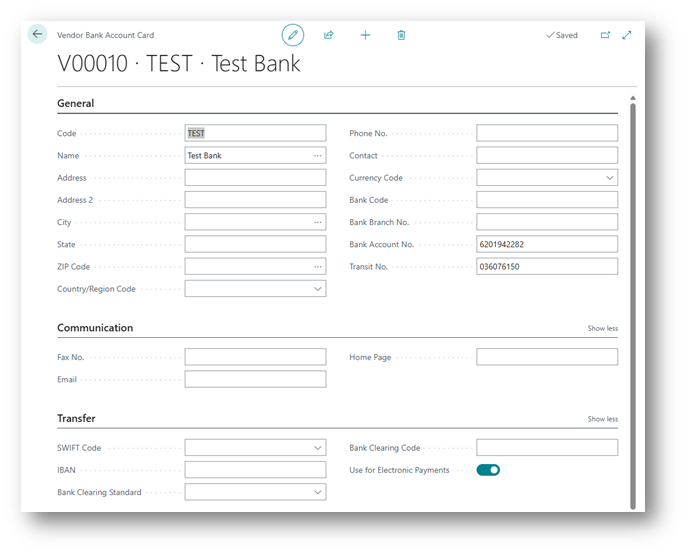
Vendor Bank Account Setup
The vendor’s bank account information, which will be pulled for ACH processing, can be saved directly on the vendor card.
To save vendor bank account information, go to:
- Vendor Card
- Select Vendor > Bank Accounts
- Click +New to add a new bank account
- Fill out the vendor bank account General section.
- Ensure the following fields are populated as they are critical to submit an ACH transaction: Code, Name, Bank Account No., and Transit No.
- In the Transfer section of the vendor bank account card, turn on Use for Electronic Payments
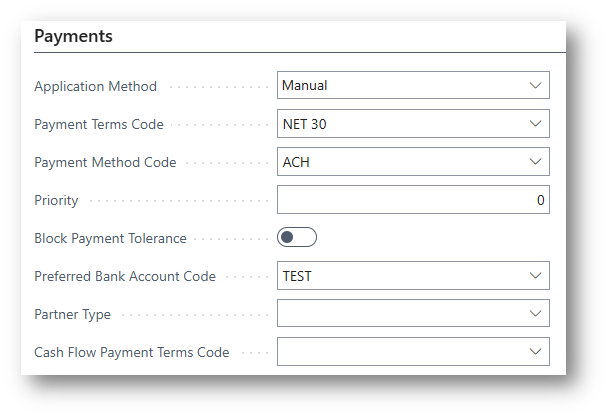
Once the vendor bank account information is saved, it’s recommended to also set both the Payment Method and Preferred Bank Account Codes on the vendor card. This will save you a few clicks during the actual payment process.
- In the Payments section of the vendor card, populate the:
- Payment Method Code
- Set code to something that helps you identify the transaction as an electronic payment. The example below uses ACH
- Preferred Bank Account Code
- Set to the new account created
- Payment Method Code
Company Information Setup
Another Business Central section used for electronic payments is Company Information. The ACH file that will be issued to the bank will need both your company’s federal tax ID and legal business name. To update/edit this information in Business Central:
- Click the settings icon (gear) towards the right of the black ribbon
- Select Company Information
- In the General section, ensure Name and Federal ID No. are correct
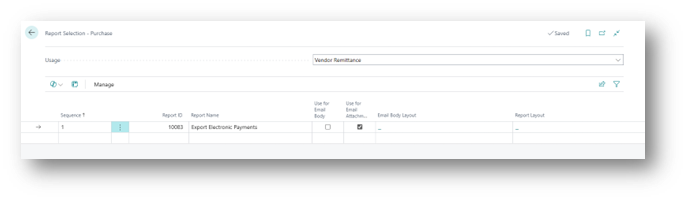
Report Selection Setup
Finally, the last configuration step for setting up ACH transactions in Business Central is to select the default report ID used for vendor remittances. This will allow you to both print or email a vendor remittance during the payment process.
To update the vendor remittance:
- In the global search, type Report Selection – Purchase
- In the Usage field, use the drop-down menu to find and select Vendor Remittance
- Populate the Report ID to 10083 and check either the Use for Email Attachment or Use for Email Body option
Prepare Payment Journal:
Now that you have all the required information setup in BC, you’re now ready to issue an electronic payment. Follow the steps below to process an ACH transaction.
- Go to Payment Journals
- Create a new or select an existing journal batch
- Important – Be sure to create or select a journal batch which has the Allow Payment Export option turned on.
- Fill out the payment journal as you normally would. Please ensure the following fields are populated:
- Posting Date
- Document Type
- Document No.
- Account Type
- Account No.
- Recipient Bank Account
- Pay Method Code
- Amount
- Balancing Account Type & No.
- For the Bank Payment Type field, select Electronic Payment
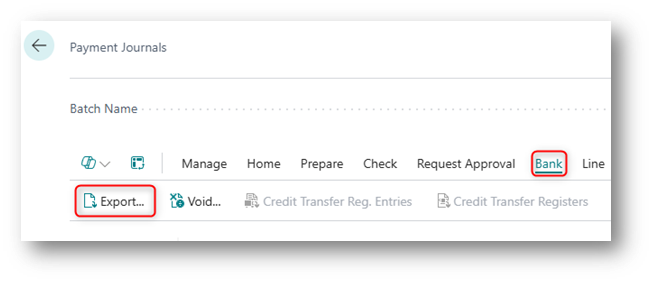
Create Payment Remittance and ACH file:
Once the journal is ready for processing:
- Click Bank > Export
- Populate the Bank Account No. field with the same Bank Account selected in the journal.
- Output Method will allow you to select between printing, creating a PDF, or even emailing the remittance file.
- Click OK
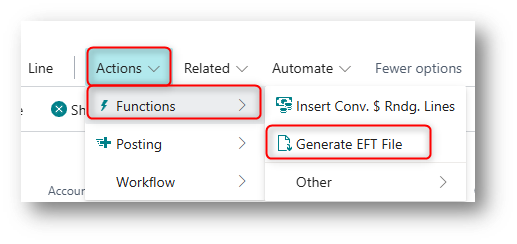
- Once the Payment Remittance file is generated, go to Actions > Functions > Generate EFT File
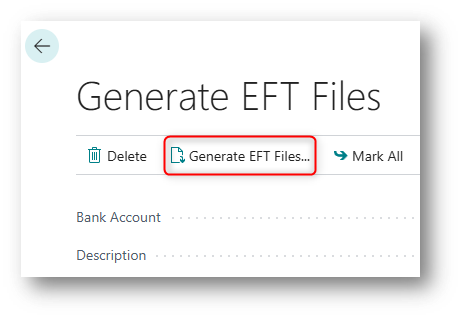
- Electronic payment line(s) created will be listed in the Generate EFT Files screen. Here you can select which transactions lines to include in your ACH file(s).
- Click Generate EFT Files once transactions lines are selected.
- File will automatically download to your local drive.
Common ACH Setup Issues in Business Central
If ACH file generation isn’t working as expected, review the following areas:
- Missing or incorrect transit numbers
- Vendor bank accounts not marked for electronic payments
- Incorrect payment export format configuration
- Journal batch not configured to allow payment export
- Missing company Federal ID information
- Missing Data Exchange Definition configuration
- Incorrect Bank Payment Type selection
- Missing Preferred Bank Account on the vendor record
- Insufficient user permissions for payment export
Many ACH issues can be resolved by validating these settings before generating the EFT file.
Need Help with Business Central Payment Processing?
Whether you’re configuring ACH payments for the first time or troubleshooting an existing setup, BCS can help you get more value from your Business Central investment.
Frequently Asked Questions about ACH Payments in Business Central
What are ACH payments in Business Central?
ACH payments allow businesses to electronically transfer funds to vendors through files generated directly from Dynamics 365 Business Central.
Does Business Central support EFT payments?
Yes. Business Central supports ACH and EFT payment processing through configurable payment export formats.
What information is required to set up ACH payments?
You’ll need bank account information, vendor banking information, company information, and a configured payment export format.
How do I generate an ACH file in Business Central?
After preparing a payment journal, use the Export function and Generate EFT File process to create the ACH file.
Can Business Central email vendor remittance advice automatically?
Yes. Business Central can generate vendor remittance information and either print it, save it as a PDF, or send it electronically depending on your report selection and payment configuration.